Manage Requirements
Requirements are the features and specifications given by the customer for the product or project. Organizing the requirements in a structured way is a big challenge. Many companies use documents and spreadsheets to capture this. But at a later time, they feel the difficulty in tracking them and tracing them to the tests.
QAMonitor provides the best way to track the requirements.
- Login to QAMonitor.
- Select a project from the project list box.
- Click on the Requirements icon.
- A new screen will appear.
Add Requirements Folder

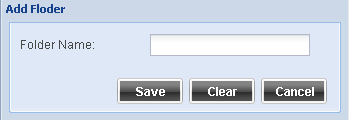
On the requirements screen, click on Add Folder icon on the left hand side panel. A new window will open.
Folder Name - Enter the name of the folder.
Click on Save.
You will see the folder appearing on the left hand side panel.
To add folder under any other folder, select the parent folder and click on New Folder. Repeat the process as needed.
By default, the folders are alphabetically listed. If you want to rearrange requirements in a specific order, you can drag and drop the folders at desired locations within the folder tree.
Add Requirements
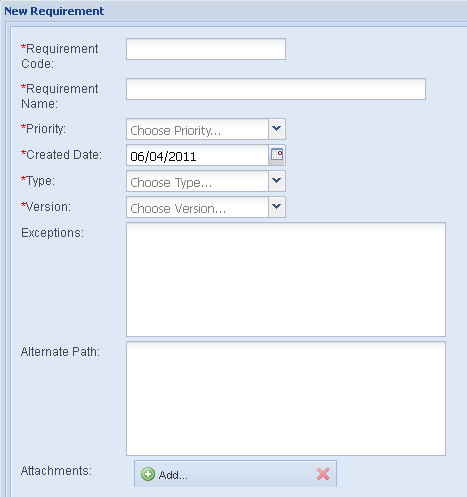
On the requirements screen, select a folder on the left hand side panel. Click on New Requirement. A new window will open.


Requirement Code - Enter the unique code for the requirement as per your company norms. If project is set up with auto generation of requirement code, then system will generate sequential requirement code.
Requirement Name - Enter 1 line name for the requirement.
Priority - Choose the priroty from the list box.
Created Date - Defaults to current date.
Type - Choose the type from the list box.
Version - Choose the version from the list box. This will be the current default version, set by the admin. Refer to version control of requirements under Settings.
Exceptions - Exceptions are any error situations that can arise out of requirements.
Alternate Path - This is another route thru which we can achieve the same requirement.
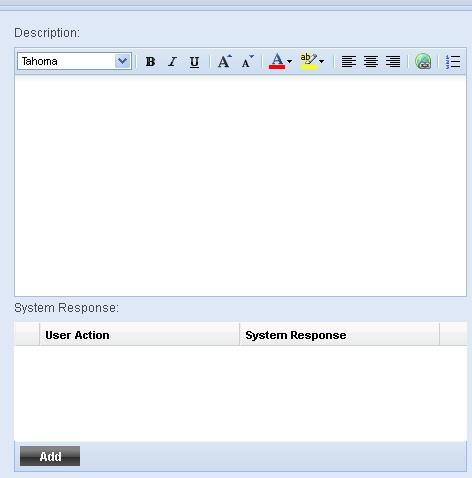
Description - Detailed Description of the requirement.
User Cases - if you want to add requirements in usecase model, click on Add button. It will add a row.
User Action -Enter what the user will do in this text box.
System Response - Enter what the system will do for the user action.
Repeat above steps to add more line items for the use case.
Click on Save.
When you close the new requirement screen, the added requirements will appear in the requirements grid in alphabetical order of the requirement ID. If you want to rearrange them in some other order, you can drag and drop the requirements within the grid.
Import Requirements
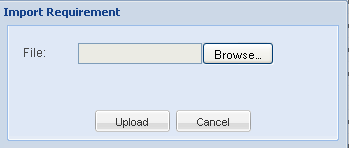
On the requirements screen, select a folder on the left hand side panel. Click on Import. A new window will open.

File - Click the browse button and choose the xls file where the requirements are entered.
Upload - Click on upload to upload all data.
The column names in the xls file must exactly match the template that is prescribed by QAMonitor.
The data entered in the xls file must also follow the data validation rules as followed on the screens.


