Create Test Scenarios and Test Cases
Test Plan screen is the place where testers will create test scenarios (what to test) and test cases (how to test). From this screen we can map test cases to requirements for traceability.
- Login as any user.
- Goto Test Plan page.
- Select a project from the list box.
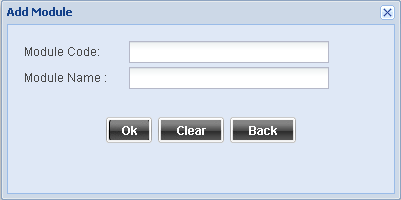
Add Test Module

We need to first create test modules. A module is a logical division of the product. You can use functional areas as modules or screens as modules or data groups as modules, the choice is yours.
Module Code - A unique code within the project.
Module Name - Name of the module.
Click on OK to save the details.
Add Test Scenario

Test Scenarios are what we plan for testing. If you ask a question - what to test, a set of simple answers will come out. These need to be documented as test scenarios. You can create a hierarchical tree-like set of test scenarios for better clarity.
Once a test module is added, select the module from the list box.
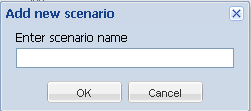
You will see a root folder on the left hand side panel. Select the root folder. Click on Add folder icon. A new window will open.
Scenario Name - Name of the test scenario.
Click on OK to save the details.
By default, the folders are alphabetically listed. If you want to rearrange scenarios in a specific order, you can drag and drop the folders at desired locations within the folder tree.
If you want to copy the exact folder structure as you had given in requirements, select a folder under scenarios tree, click on the Copy folder from requirements icon. It will display a new window with exact requirements folder tree. Select a node from requirements tree and click on Paste. The requirements folder structure will be copied under the selected scenarios folder. This copies the structure only.
Add Test Case
Test Cases are the step by step instructions to conduct the test. If you ask a question - how to test, a set of simple steps will come out. These need to be documented as test cases. You can create multiple test cases under one scenario.
Select a test scenario.
Click on Add test case icon. A new window will open.
Testcase Code - A unique code for the test case. If project is set up with auto generation of test case code, then system will generate sequential test case code.
Testcase Name - One line description for the test case.
Priority - Choose the priority from the list box.
version - Choose the version of the test from the list box. This will be the current default version, set by the admin. Refer to version control of test cases under Settings.
Planner - This is the currently loggedin user.
Type - Choose the type from the list box.
Description - Detailed description of the test.
Click on Add button to give step details. Precondition - This is the prerequisite for the test.
Test Step - An individual step within the test.
Expected Result - The expected outcome for the step.
You can add multiple test steps.
Testcase Attachment - Any file that has test data.
Testcase Script - An attachment for automated scripts.
Click on Save.
When you close the new test case screen, the added test cases will appear in the test case grid in alphabetical order of the test case ID. If you want to rearrange them in some other order, you can drag and drop the test cases within the grid.
When you want to create a test case similar to another test case, select the source test case in the grid. Copy the test case and click on paste. This will create a copy of the test case. After this you can edit the newly pasted test case to make any textual changes. This will reduce time for the testers to cerate a large amount of test cases with minimal variations.


